Creating Contract-Level 533Q
This guide will show you how to use the NASA Form 533Q Creation Wizard to create a Contract-Level 533Q.
Navigation
Modules > Financials > Agency Reporting > NASA Form 533Q Creation Wizard
Step 1: 533Q Type Selection
- Select "Create a Contract-Level 533Q Only" for Step 1 of the Creation Wizard.
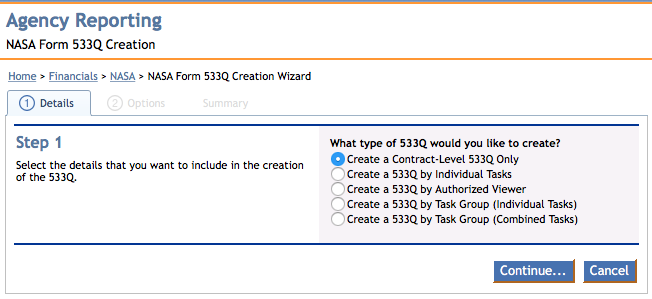
Step 1 of the 533Q Creation Wizard.
Click Continue to move onto Step 2. Click Cancel to return to the Agency Reporting menu.
Step 2: Quarter Beginning Selection, Miscellaneous Options, and Delivery Options
The second step allows you to configure the Quarter Beginning, Miscellaneous options, and Delivery options of the Contract-Level 533Q.
Quarter Beginning
- Quarter Beginning (Column 8a) selection
- For reference, this also displays the corresponding dates associated with the selected Financial Month to the right of the selection dropdown.
Miscellaneous
- Report Individual Tasks by Subtask?
- Show Labor Class details, if available?
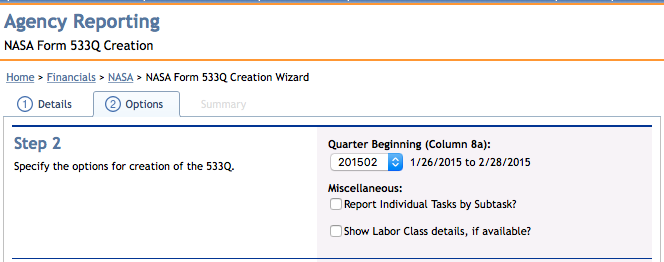
Part 1 of Step 2 of the 533Q Creation Wizard.
Delivery Options
Note: You must select at least one Delivery Option before the report is generated.
- Email to Me?
- Email to Users?
- Selecting this option will reveal a menu that allows you to select specific Users associated with your contract that are in the iSite system.
- Check the box next to each individual's name to send it to that individual. You can select as many Users as you wish.
- To email to all Users, check the box next to "User" in the header of the menu.
- Email to External Addresses?
- Selecting this option will reveal a menu that allows you to input email addresses external to the ones in iSite.
- To input multiple address, separate each email address with a comma (,).
- Save to Document Library?
- If selected, you can choose the Library and Folder that you wish to save it to.
- In addition, you can choose to overwrite the file if it already exists.
- Download to Personal Download Queue?
- You can also choose to view your Personal Download Queue, which will open in another browser tab.
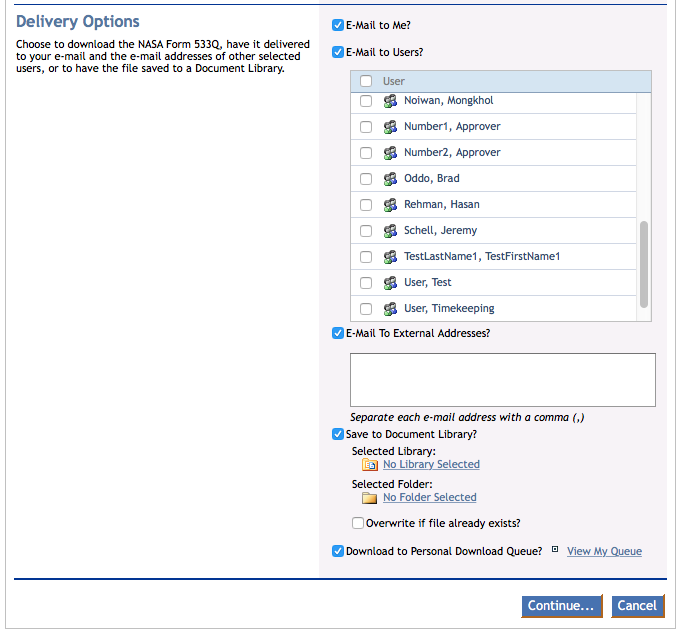
Part 2 of Step 2 of the 533Q Creation Wizard.
Click Continue to move onto Step 3. Click Cancel to return to the Agency Reporting menu.
Step 3: Summary
Although there is nothing to configure, the third step allows you to view a summary of the settings of the Contract-Level 533Q before it is created. It breaks down the following information:
- Details
- Specified in Step 1.
- Financial Month
- Specified in Step 2.
- Report Individual Tasks by Subtask?
- Specified in Step 2.
- Show Labor Class details, if available?
- Specified in Step 2.
- Delivery
- Specified in Step 2.
- File Name
If you would like to reconfigure any of the settings, you can navigate back to Step 1 or Step 2 and configure as necessary by clicking the corresponding Step.
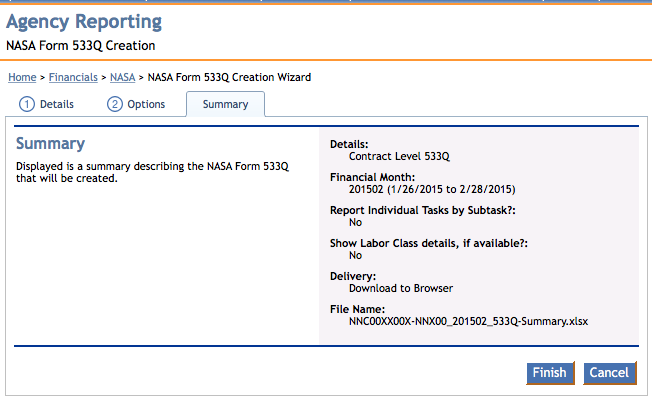
Step 3 of the 533Q Creation Wizard.
To finalize the creation, click the Finish button at the bottom of the screen. Click Cancel to return to the Agency Reporting menu.
Report Generation
When the Contract-Level 533Q has generated, iSite will alert you when the report has been successfully delivered.
If you configured the Delivery Options to send the report to your email or external emails, you will receive the following notification in the bottom right corner of your browser:
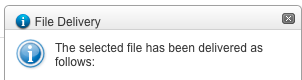
The File Delivery notification. It will list each email address that the file was delivered to.
Personal Download Queue
If you configured the Delivery Options to send the report to your Personal Download Queue, you will receive the following notification in the bottom of your browser:
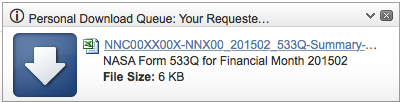
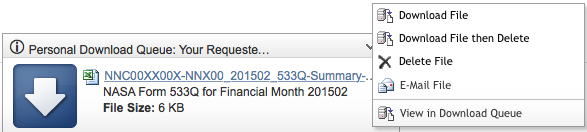
Clicking the arrow to the left of the red X in the right corner of the notification will reveal a menu that will allow you to execute any of the following actions if you wish:
- Download File
- Download File then Delete
- Delete File
- E-Mail File
- View in Download Queue
Page ID:3349-5545-9201